Friday, September 21, 2012

New stuff! New Stuff!

Catching up from a week of having NO time to post.

First, I finally got some lovely banjo skins. These come from Clifford Essex Music in England. I already have an old Essex head on my British-made banjo, so I know that they were at least good in the 50's.


It's really hard to get a picture of these - but they sent me TWO skins - the fantastic correct skin, and a factory second to practice with . Even the factory second is better than what I have worked with before.

Nice.

So good - smooth, with a surface almost like index paper.

I finally got around to taking the clamp off of the Nunes uke.

I really hope that two weeks was enough drying time.

Loosen loosen loosen

Snip the wire.

The string is just hanging there.

And everything simply fell out. That wax on the block kept it from sticking.


And - it looks okay. I would have preferred for the reinforcement to butt up higher inside, but this will work. It appears that, when originally made, they sanded this side too thin.

And, finally, I picked up a new project yesterday. 


It's a Guild D35! Something is amiss, though.

Not only is the headstock busted off, but repairs have been attempted. It's a disaster.

Oh this is horrible.

Caked on glue. I'm not sure yet if it is epoxy or yellow glue. I'm scared to find out.

A nice crack in the fretboard, some circular depressions from C-clamps, and more glue.

Rust on the frets? It hasn't been played in years, but this is a bit surprising.

I have two other Guilds that are roughly the same model, and they have the same little crack next to the pickguard. As the guard shrinks, it pulls the wood away from the fingerboard extension. Unfortunately, with the pickguard cemented directly to the wood, and then covered with the finish, this is tough to repair.

Um, wow. Those circles are from the C-clamps, and - wow.

I mean, seriously. It looks like a prop from a caveman movie.

Nothing is lined up, and everything is covered with glue.

The trussrod nut won't turn, it's glued too.

A big puddle of glue between the fingerboard the the chunks of the neck.

A little chunk of damage here too.

The back is fine. There is a finish crack along the middle, this might have been in a storage unit where it got rather hot.

There is some nasty finish damage at the bottom.

Yuck. This must have sat on some vinyl of some kind for a while. It's still a bit tacky to the touch.

Sure is easy to sight the neck without that pesky headstock and nut in the way!

These labels make me happy.


An attempt to line up the headstock with the neck is a complete failure, but reveals that there is wood missing.

Wow.
So, what we have here is a guitar that, in mint condition, might go for $500 - $800. It needs at least $1,200 worth of work, either repairing or replacing the neck, setting the neck, and extensive finish repair. It is not worth it. I'm not sending this to the factory, or to a repairman.

I also paid a whopping $5 for this beauty, so I don't have to do ANYTHING. I can take my time. A couple years. I can take this neck apart and see what I can to to build it back up - some serious scarf joints and new wood seem obvious. I can also hang around in case a neck shows up with somebody.

My current plan is to clean the guitar, stabilize the gooey finish, and disassemble the neck and remove it from the body. I don't know if any of it can be saved, but I might as well have fun trying.

Wednesday, September 5, 2012

Quick student uke fix

I generally take what little time I have on weekends to work on instruments, because I know I won't have time during the week. But tonight I had a task - a student brought me the inexpensive uke that his dad bought for him at a flea market. It needed a nut, and the fretboard extension was not glued down at all. This child is in my class, and I figured I better get it done tonight, otherwise I will be enduring a barrage of questions tomorrow."Did you fix the uke?" "Where's the uke?"

I had to work really fast, since I also had the boys to bathe and get to bed.

The uke in question. Cheap.

I was thinking to use a bit of old cutting board, but I found a tiny piece of bone that would make a perfect nut. I didn't care about the voids and stuff - that side would face down, and this was a REALLY quick job.

I did some really rough shaping (it's embarrassing) and made some marks for the outside strings.

I notched the spaces for the strings with an exacto saw.
At this point, I went to sand the nut down a bit more. I ended up dropping it on the ground and breaking it in half. There was NO WAY I was coming back to this, so I glued the two pieces together with cyanoacrylate glue (super glue) and hit it with a bit of accelerator to dry the glue instantly. I sanded off the squeezed-out glue, and went merrily on my way. 


I cut the slots with some nut files, and was done.

The fretboard tongue was completely loose. I showed some wax paper underneath, and took the insert from a bill and used it as a glue carrier.

More CA glue - this is Gorilla Super Glue.

I slid the paper under the fretboard, and wiggled it around.

I slid it back out, then slid out the wax paper.

I just clamped it down quickly, and called it done. Within an hour the whole thing was set and finished.
This was not even worth blogging about, except that I promised myself that I would blog EVERYTHING. This quick and dirty job was not worth the time and effort, but I know this student will be thrilled, and that's reason enough.

Tuesday, September 4, 2012

Winding in a reinforcement.

A brief one today - gluing the reinforcement in.

Waxing the caul with an old candle, in an attempt to keep it from sticking to any errant glue.

I cut out a liner for the bottom of the uke - I didn't want to get glue all over that nice label.

That should work.

Glue time - I used yellow wood glue, since I didn't know how well I would do at threading the piece in once I got started, and I figured that I would need all the working time I could get. hide glue might have set too soon.

At this point, it all went wrong - the string would itself around the block and the reinforcement piece, and I had to pull the whole mess out and start over. Here, I am pulling the string through again, and ready to start winding it on the tuner.

And here it is - it worked the second time, the reinforcement clamped up nice and tight.

Sunday, September 2, 2012

Making a string clamp

Had a good hour of work today.

Back to the Nunes uke. The top is looking good, the cracks are nicely glued up. Although they are still a bit visible, they are very solid.

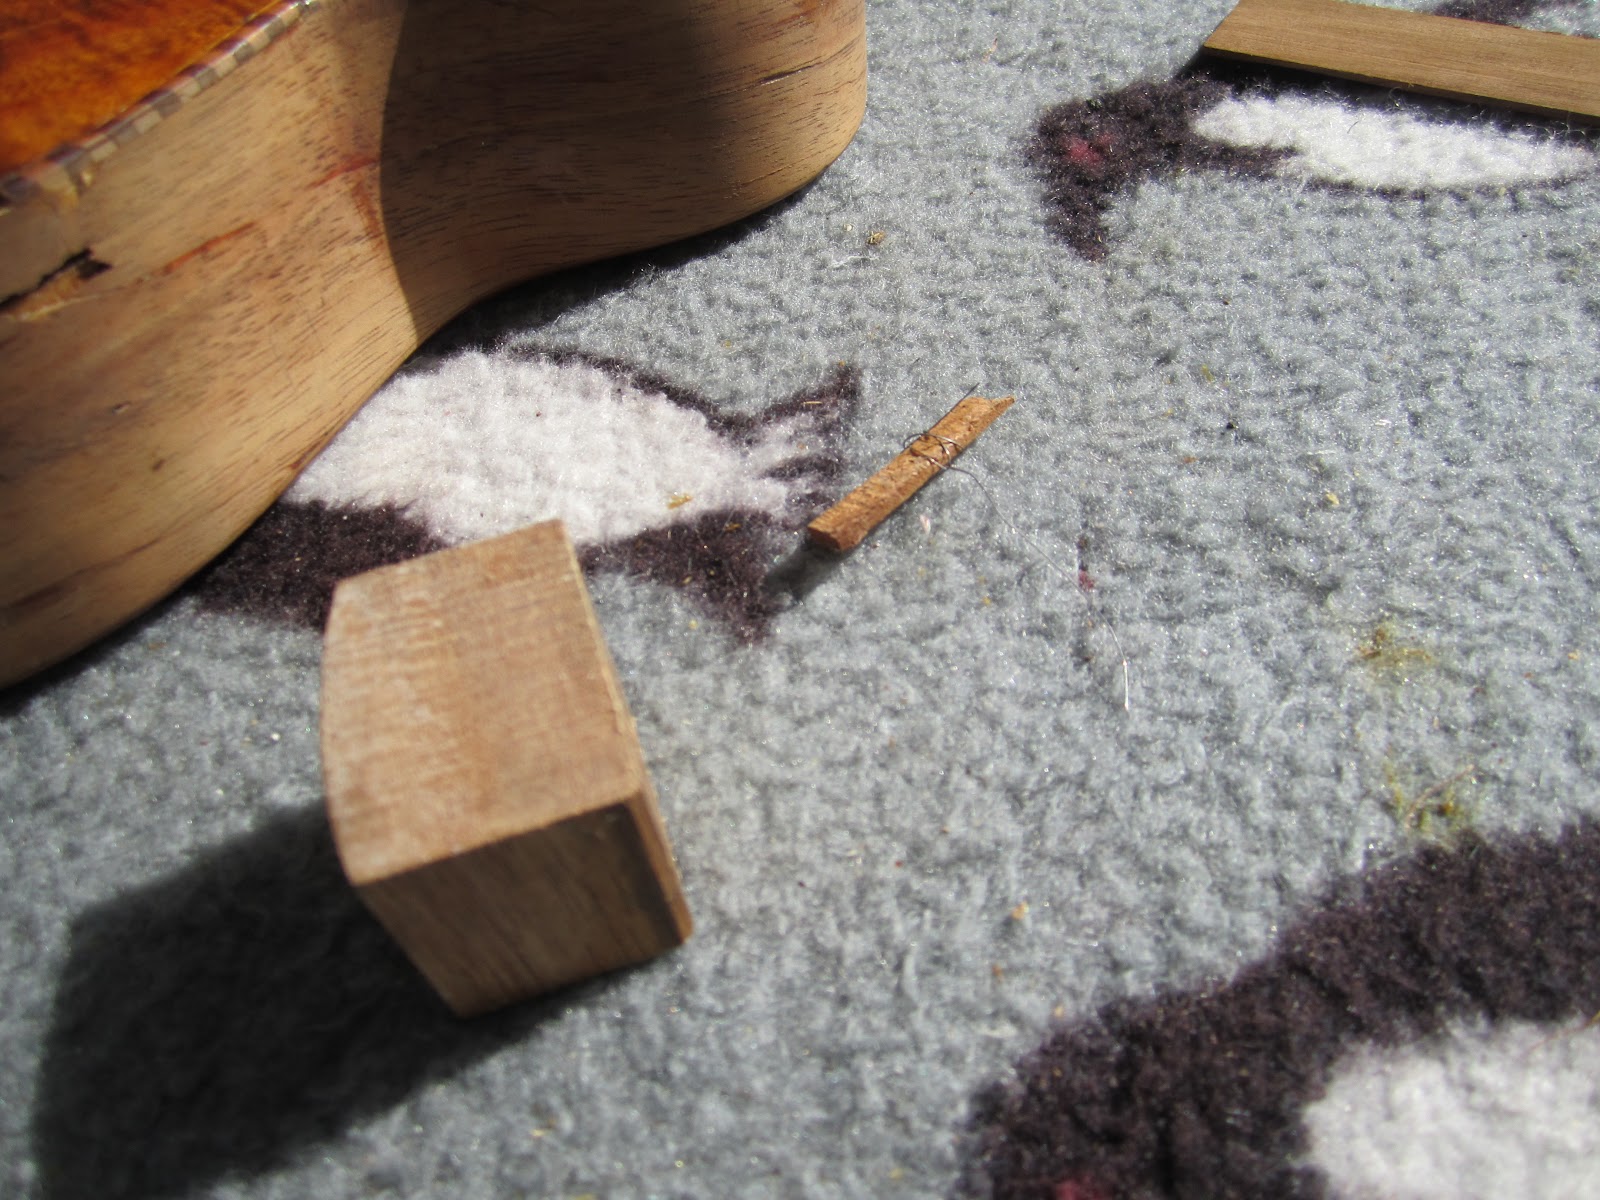
That side hole needed some serious reinforcement, especially with how thin the wood is. I prepared to build a string clamp. I found a block of wood, and a single tuner. 

 Some help with drilling holes.

 And here it is - it will draw the string in, and draw whatever is on the string closer too.

I took some magnets, and traced the linings and some random bits of wood on the outside of the uke. There are some reinforcement cleats in there that I have to watch out for.

 I made a thin piece of koa, and marked places to drill both it and the side of the uke so that a guitar string could pass through.
 This tiny set of drill bits belonged to my grandfather. He told me that they were used to drill the holes for pilot lights in radiators. Very tiny, very fine.
 So fine that I couldn't chuck them in my drill, and had to chuck a chuck in my drill so that I could chuck the bits in the chucked chuck. The hole is tiny. It will be a cinch to fill it with a bit of glue and dust, or even just a bit of drop shellac. Actually, I might fill it with pore filler, now that I think about it.
 And here we go. I tried a test run to see how it would work.
 And I promptly split the reinforcement in two. That won't work...
 So I made a caul, and then wet a new reinforcement and rubber-banded it on the caul. This should mold it so that it works without breaking.

 I also added a bit of gasket material to the clamp. I decided not to do any gluing now, I was running out of time and wanted to have no rush when I did the job.
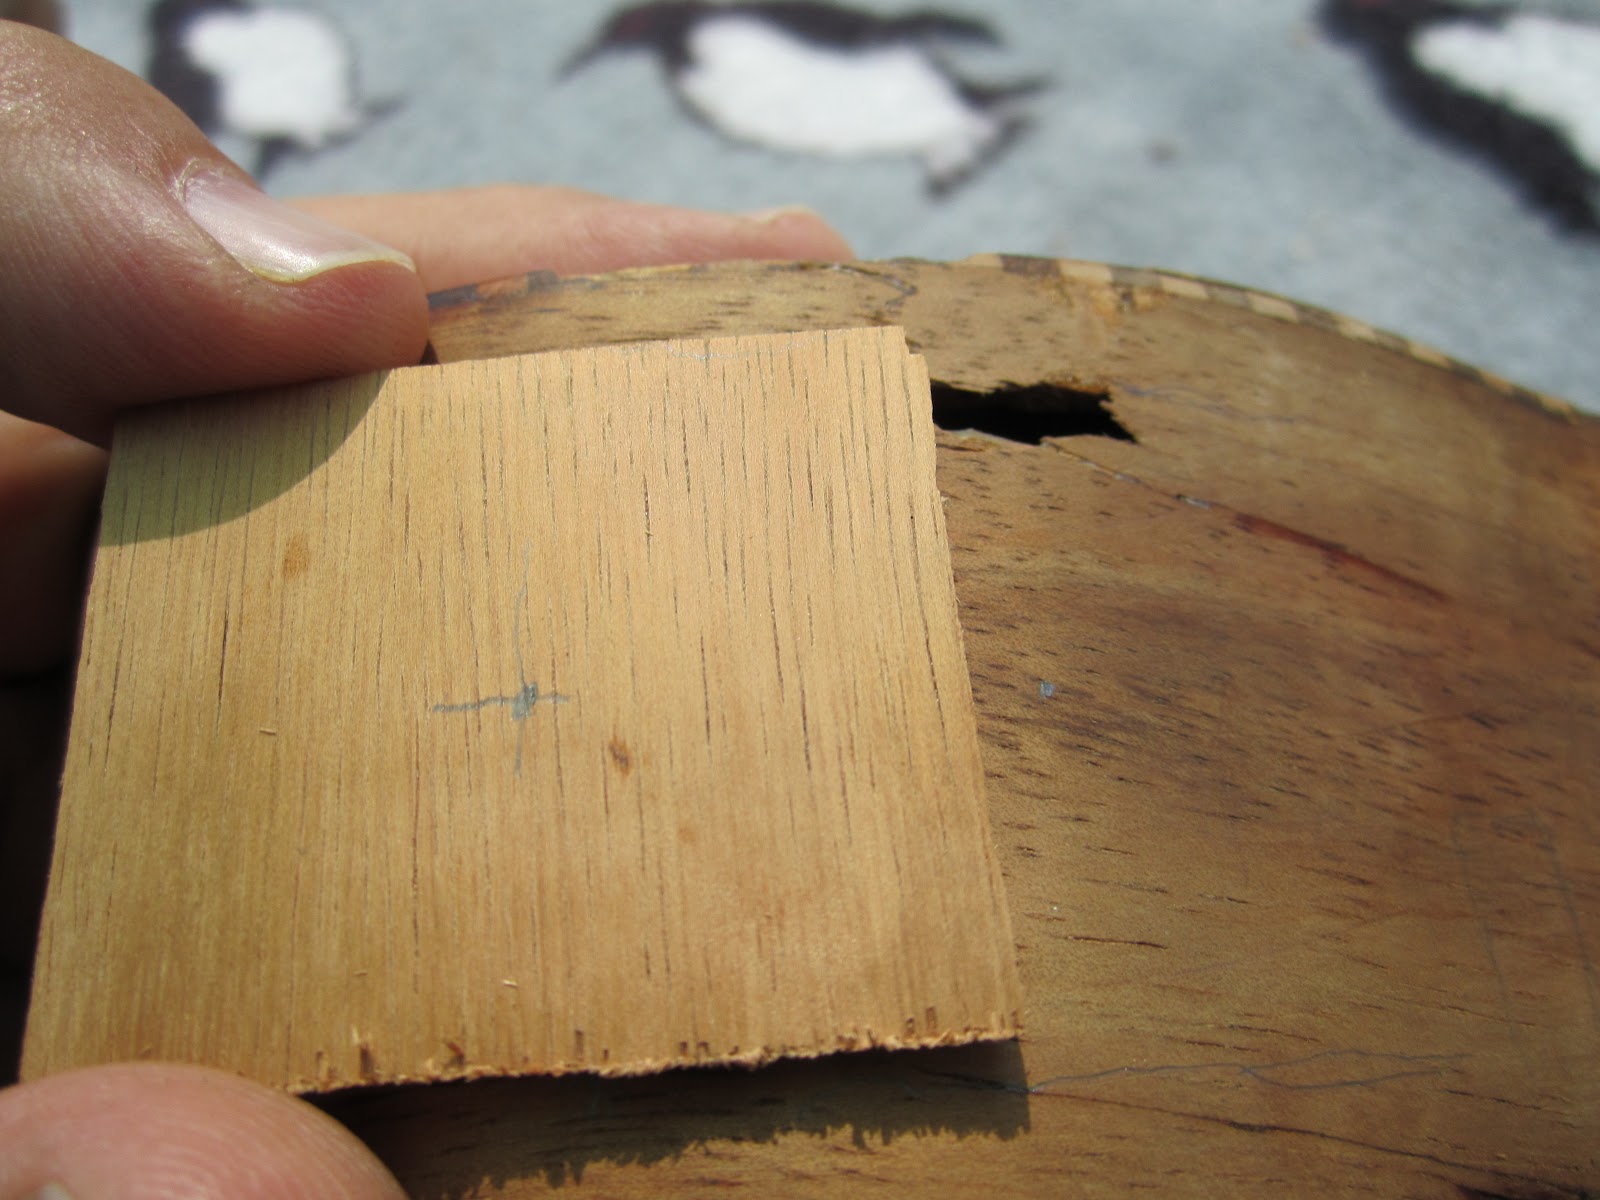
 I did take a look at the busted up binding. This will need to be replaced.
 I took a chisel to it, and slowly cleaned it out.
 Nice and clean, now I can make up a new section, and place it in.
That did it for the day - it was time to make lunch, and head out for the day.