Showing posts with label Kamaka ukulele. Show all posts

Tuesday, June 23, 2015

More work on making the Kamaka flat again

I've had just a little time over the last couple of days to work on that Kamaka.

To review, the end block is too long for this instrument, and has pushed both the top and bottom off from the sides. I've already fixed the bottom, and now to work on the top. 


That crack is actually useful, it relieves the stress when I work in the sanding card. 


This is a sanding card. I glued 60 grit sandpaper to a gift card, and cut it down in width. It is flexible, thin, and stiff. 


I work the sanding card in and out, bending it up so that it doesn't also sand the sides. I put some pressure on the top in places as I work the end block down.  

After about 20 minutes, it is getting closer. 


Another 15, and I'm really close. The sides of the block are still too high, so I work these with more pressure.  


Once I was happy with the end block, I then got to work with a tiny sanding block for the bridge area. The bridge was never glued down flat, and there was some pretty thick residue to be scraped away. 

I also used a knife for some of the work. I always forget that I can sharpen these things. 

Well, here is something funny. I was trying to plan for regluing the bridge, and discovered that the bridge brace, called a popsicle brace in the case, is only under the bottom half of the bridge. I put a craft stick in the place where it is attached. Weird! This also complicates gluing the bridge, as I want a nice flat caul underneath the bridge. I'll cut up a craft stick and attach it to the caul, which should balance things out pretty well. I won't do it today, though, I'll just glue the end block. 

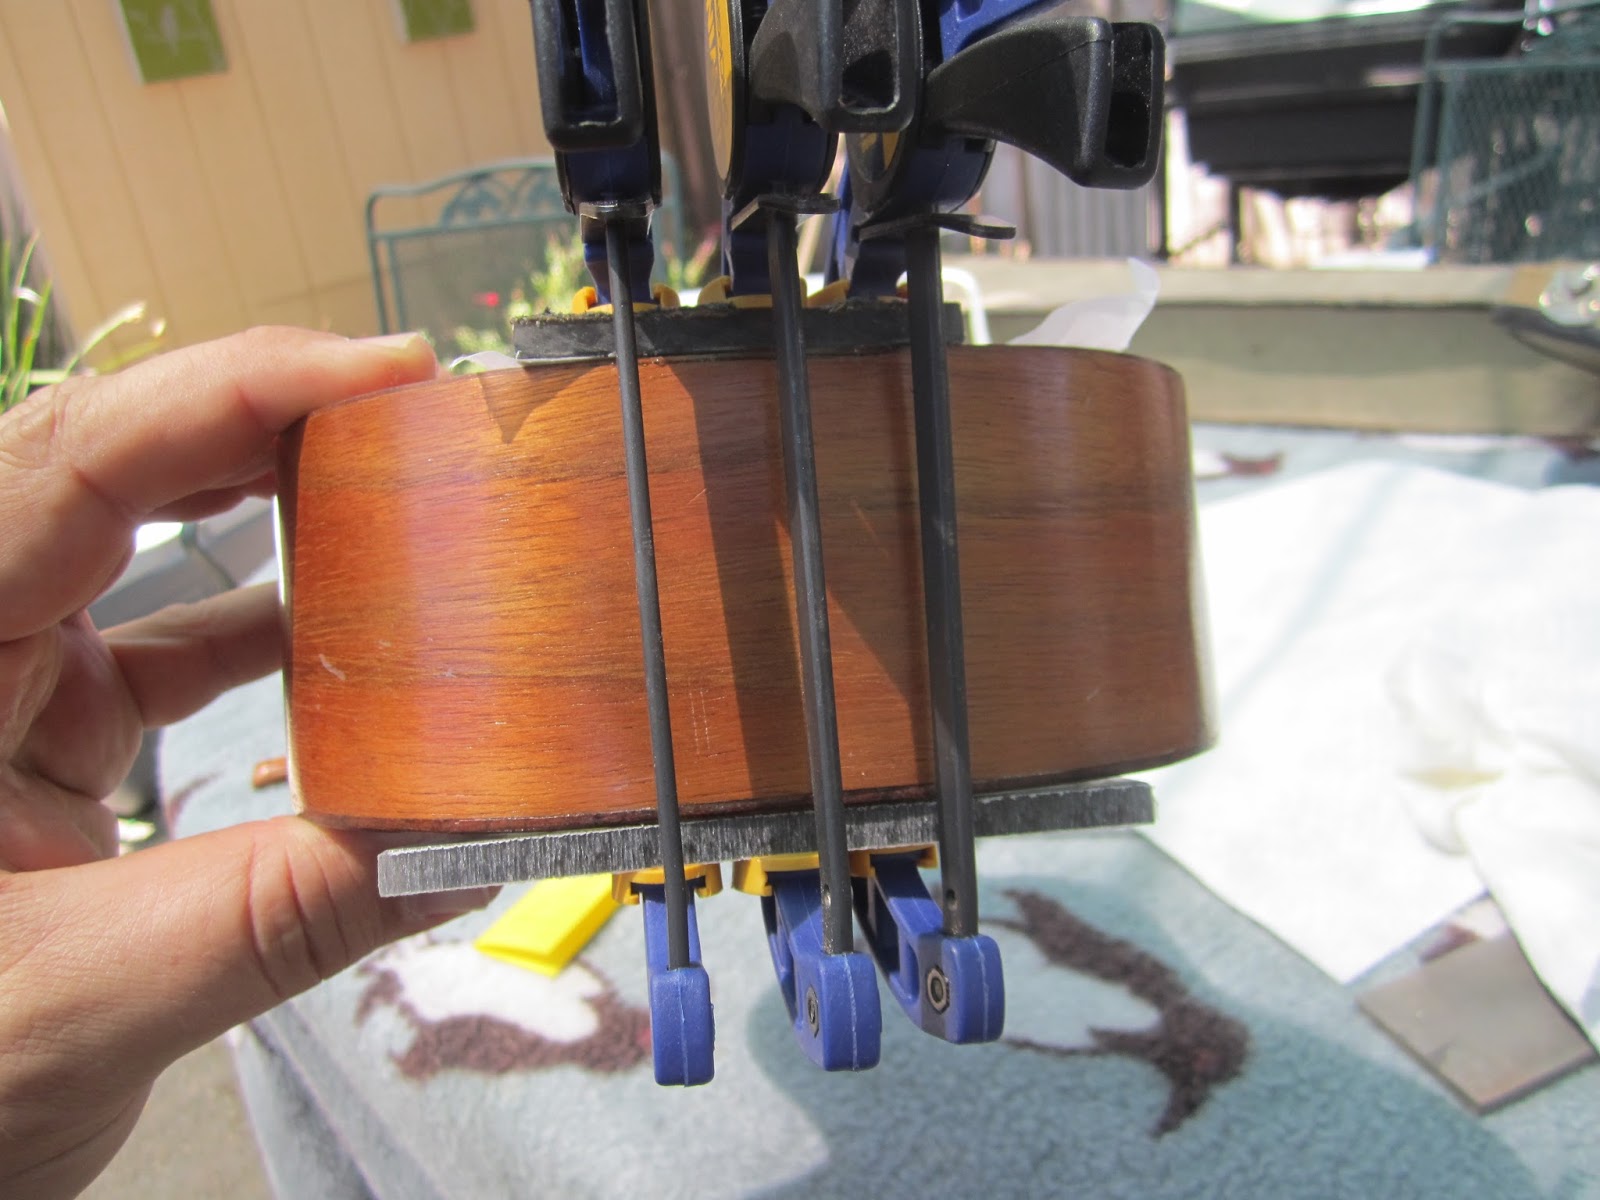
Hide glue and some acrylic plates to keep everything flat. I glued the crack too, might as well. 

I also did some gluing on a stenciled Silvertone that I am putting back together. Easy stuff. 
The Kamaka is really coming along, I just need to reglue the bridge, and possibly do a little intonation work with it, and then it will be done. The Silvertone has a few more tight cracks to deal with, but nothing awful. I hope to get back to the Guild and Cromwell later this week.

Monday, June 8, 2015

Opening the top on a Kamaka uke

Today was a hot day, 104 degrees in the forecast. This is great if I need to use heat on an instrument, but not great for me.
The instrument in question is a late 50's, early 60's Kamaka uke, with the most beautiful top I've seen on one of these. The problem is that the uke shrank when it left the moist Hawaiian climate and came to the dry mainland. One part did not shrink, the tailblock, which may have been too long to start with. (These were hastily made instruments. They are wonderful, but let's not pretend that these are master-built instrument.)
I already fixed the back, by running a credit card with sandpaper on it through the rack, reducing the tailblock to the correct size. Now for the front, which is better attached, has a big crack in the top, and nothing is moving.

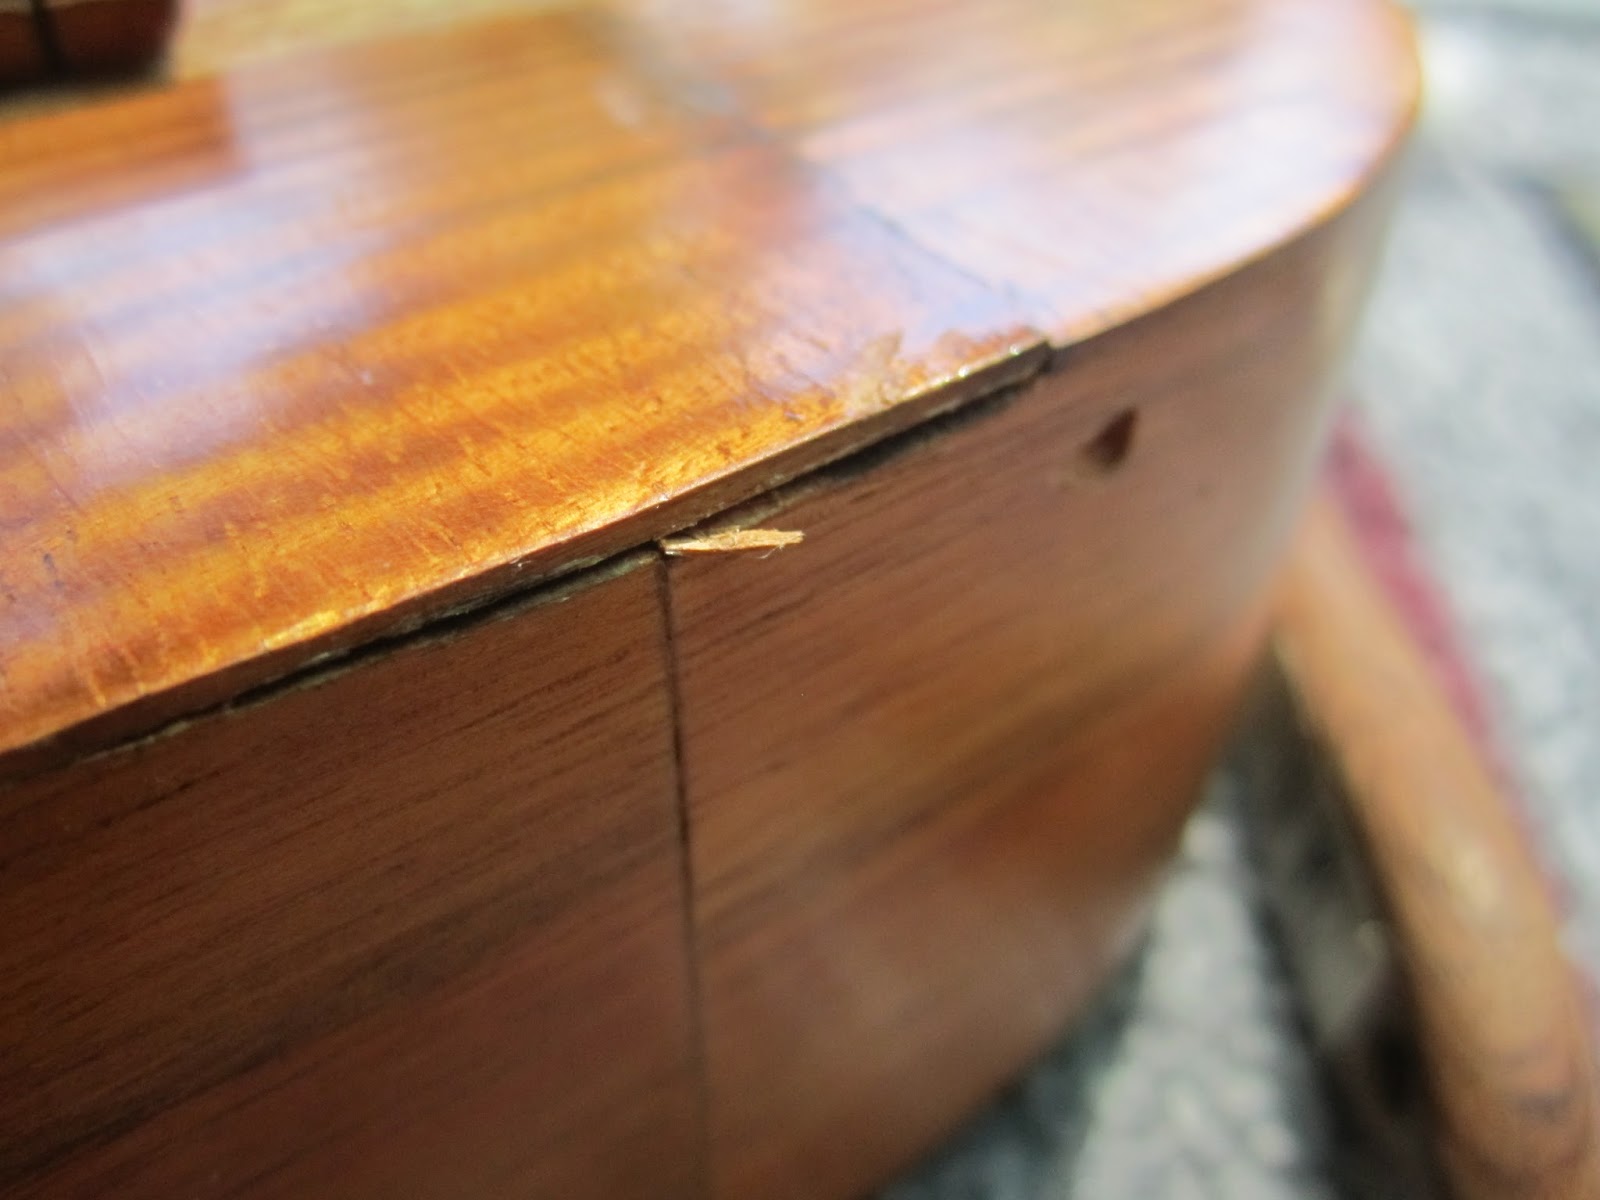
That little gap at the top is what I'm working on. 

I really don't want to lose that little splinter of wood, if I can help it. 

And here is the crack, which follows the grain of the top. The bridge is all tilted and not down very well. 

I heated up a palette knife with my alcohol lamp. I also used a pipette to drip in a little water from time to time.  

After a bit of water and jsut a little prying, the bridge popped off. Notice how little of it actually made contact with the top. I'll have to clean off this glue and make sure that the contact is much better.  If you look carefully, there is a spot of white haze under the right side of the bridge on the top of the uke. This was the result of a bit of steam coming off the palette knife when I put it into the water. I wiped that with alcohol and it went away. 
Sure enough, that splinter cam loose. Now what? 

I grabbed a sticky note, and stuck the splinter to it. 

Fold it up, and stick it in the case. I can put it back when it is time to glue things back together.


After about a half-hour of careful prying and heating, I was able to loosen the top. I decided to stop and let things dry out before I went on. 

Friday, April 3, 2015

Small Kamaka and Guild work

Okay, I got a little bit of work done yesterday. Mostly, I cleaned the garage, made a new sanding board, played electric guitar for the first time in ages, and did a little work on the Kamaka and the Guild. 

I started carving away the new piece to make it look right. The big problem was that the grain was slightly diagonal, so I had to carve in the direction from the nut to the body on one side, and from the body to the nut on the other side, otherwise I would take out a huge chunk of wood following the grain, and that would probably be bad. I used a knife for most of the carving. 

Carve, sand and carve some more, then level the thing with the current fretboard. 

From the back, all looks well. This uke, like most Kamaka ukes of this period, is remarkably asymmetrical, I assume the neck was quickly formed on a belt sander. 

From the front, pretty good, although the grain is not as good a match as I might have hoped. That's enough for now - this is about 40 minutes of work to get to this point. 

I pulled the Guild D35 out, and decided to get the neck to actually sit in the pocket. I sanded, chiseled, and worked for about 45 minutes, and got it pretty close. 

Sanding revealed some significant cracks in the neck block that I could not see before. 

Pretty bad stuff. I wicked in some thin CA glue and clamped it good and tight. 

A block inside, and one outside, and LOTS of pressure. I want that crack closed, otherwise there could be some nasty trouble in the future. The neck could move around, and that would defeat all this work. 

This morning, I took of the clamp, and put the neck in the pocket. It's pretty sloppy right now. 

The glued up area. 

It's really hard to get a picture of this, but I want the top of the fingerboard to be in a plane that intersects the top of the bridge. I'm a little low now, it was better yesterday before I fixed the block. That tells me that I am on the right track, though, because if I hadn't fixed the block, I would have falsely assumed that everything was fine. 

Oh man, this is going to look so nice when it is done. That fretboard is a little gaudy, but what the heck - this poor guitar deserves it after all it has been through!
Not much work will happen for the next few days - I'll be very busy with family coming over, and shuttling the kids around from event to event.

Wednesday, April 1, 2015

More Kamaka

Okay, not a whole lot got done today, but what got done was good.

I sanded some more. 

And more.

And more! I'm not going to be able to eliminate that gouge on the side, that would simply be too risky. 

This was an amazingly thin neck to start with, and now I'm on the cusp of breaking the thing altogether. 

I made a piece to fit, but it ended up too thin. Time to make a second one. 

I needed the ends to be perfectly square to the bottom, so I got out a level and used it as a kind of shooting board, holding the piece against it while sanding on my sanding board. 

I had to round the edges slightly, as there was no way I could get the inside corners of the cutout area perfectly square. And after all this, we decided that the piece was a terrible mismatch in looks, so I made a third. 

I had other Kamaka ukes out for comparison. I'm getting to know a lot more about the Gold label era Kamakas. 

After making the third piece, it was time for some glue and an overnight stint in a clamp. 
Looking at this Kamaka and the others, I'm guessing that it is a late 50's, early 60s uke. It has a "W" written on the neck block, exactly the same as the "W" written on the neck block of another uke I have that is known to have been made in 1961, so that would be a good guess for the year. These don't have serial numbers, so that is about as close as I'm going to get for a guess.

Tuesday, March 31, 2015

Kamaka Uke, sanding blocks, and filling in missing wood

So, the last thing I posted before was about sanding blocks. Here we go.


Sanding blocks
 There you go. Get a piece of wood, and glue sandpaper to one side. After it is dry, take it to your belt sander and true up the edges. You now have a sanding block that can get into corners and clean up all kinds of problems. This is what I used to clean up the place where the bridge goes on the Cromwell, and what I started using to set up the Kamaka for wood replacement.

Speaking of the Kamaka, here is my first idea.

The sides are now flat diagonals, and I have put in some koa in the deep part of the slot. 

Not too great. 

Really ugly from the side, there is some significant wood loss here. 

I started trimming a new piece to fit in. This is an early shot, I got it to fit quite well. It's a tough fit, though.
My friend Ray came over, and we started looking at what I had done, and the instrument overall, and decided to get more drastic.

Just chop it all out, the heck with it. Much easier to fit a nice piece in. 

But how will I flatten out the bottom of that space? With another custom sanding block, of course! I made this and sanded it to barely fit in the space. I managed to get down pretty far, then the sandpaper came off, and I had to go pick up the kids, and it was time to quit. I'll get back to it tomorrow, though. 

 That is a lot of wood to remove, but it will be stronger for it. Frankly, there is no good way to fix this disaster, short of making a new neck, which I will end up doing if the thing breaks at some point. For now, this is going to create a workable solution.

I also took a look at the Cromwell with Ray.

This is that hole. 

The patch now fit perfectly. Hooray! I won't glue this up until the back braces are done, though.  
There was a nasty piece of missing wood at the bridge, so we chiseled out a bowl shaped hole. 

A little sanding made it smoother, and more bowl shaped. 

We carved a piece of spruce to roughly fit, then soaked it really well and clamped it on hard. The pressure will help it form to the hole, and then I can glue it on and shave it level. 

We ended up leaving off the wax paper, so that the moisture helps form the top as well. There will be some color and finish work to do, but at least there will be wood there to color and finish! The chip out in that spot was really bad from the previous bridge failure. 

 I'd never heard of doing a spruce repair this way before. I'm excited to see how it turns out.